

Tutorial video and overview
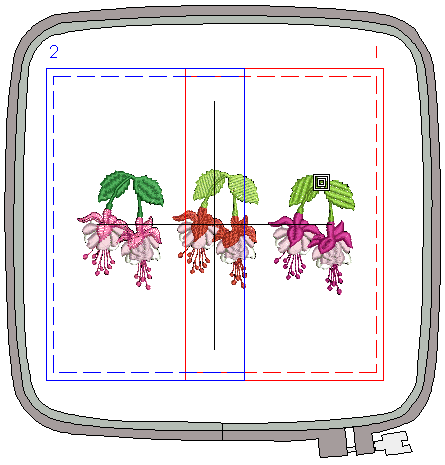
If your embroidery is too large or contains a number of designs spaced around an article, you can use the great tools in the Multi-Hooping toolbox to split it into multiple hoopings.
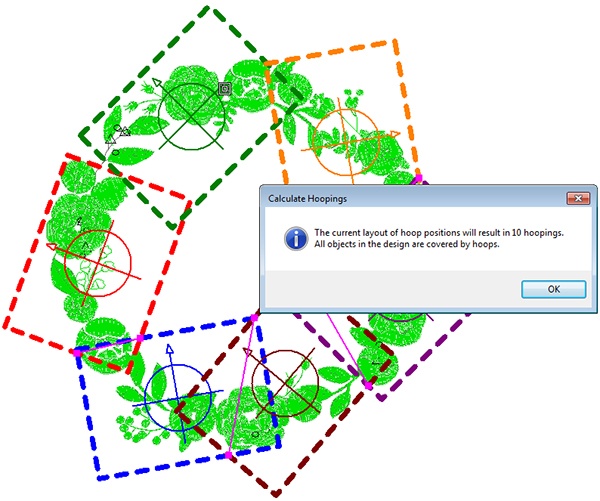
The aim is to add hoops and move them around until you get the least number of hoopings necessary to accommodate the entire design. These are then stitched out consecutively.
The Multi-Hooping Toolbox is available in Hatch Embroidery Composer and Hatch Embroidery Digitizer, and it contains all the tools you need to successfully stitch out large designs.
Multi-hooping is a very complex topic, so I added links to the relevant sections of the Hatch Embroidery User Guide, so you can have a really good understanding of all aspects of it.
Creating Multi-Hooping Designs
When creating your multi-hooping designs, you need to first select your hoop, then in order to cover your entire design, you need to add more hoops. You have the choice of either getting Hatch Embroidery to automatically add the necessary number of hoops, or you can do this manually.
Read more about how to create multi-hooping designs here.
Multi-Hooping Guidelines When Manually Placing Hoops
For successful stitch out, it is important to establish the stitching order, so objects that are in the foreground will be stitched after the ones that are in the background. Using the Sequence tool is a good method for placing hoops in the best possible order, and running the Stitch Player before stitch out lets you have a last glance over your design before it is under the needle.
Read our detailed Multi-Hooping Guidelines here.
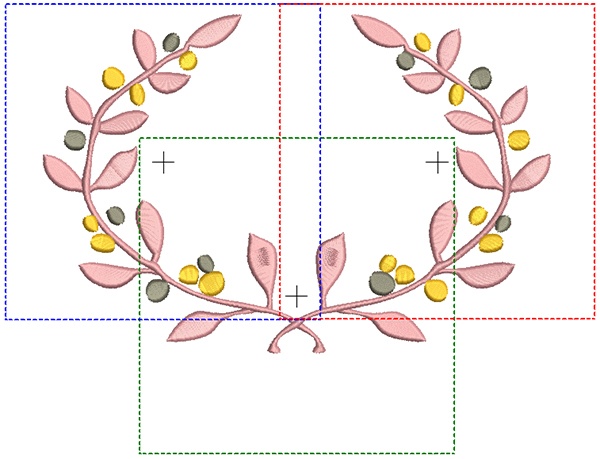
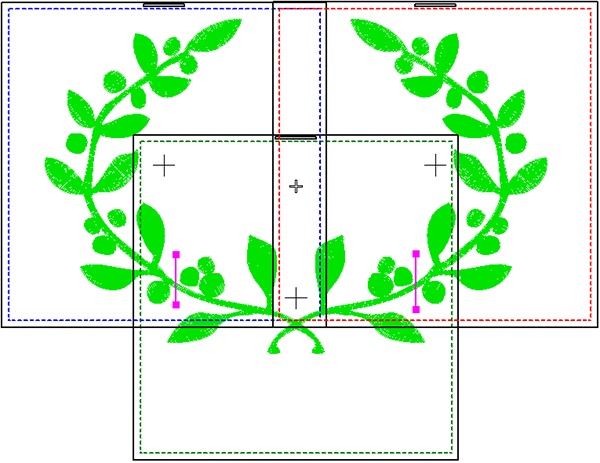
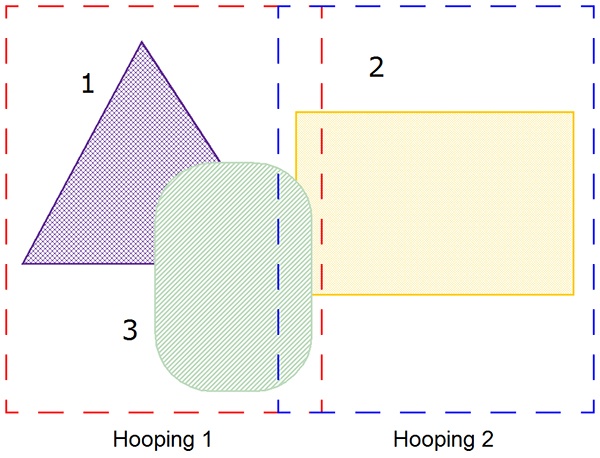
Splitting Objects Between Hoopings
The Add Splitting Line tool allows you to digitize split lines to split objects in multi-hooped designs, when it is impossible to fit the objects within a single hooping.
Read more about splitting objects between hoopings here.
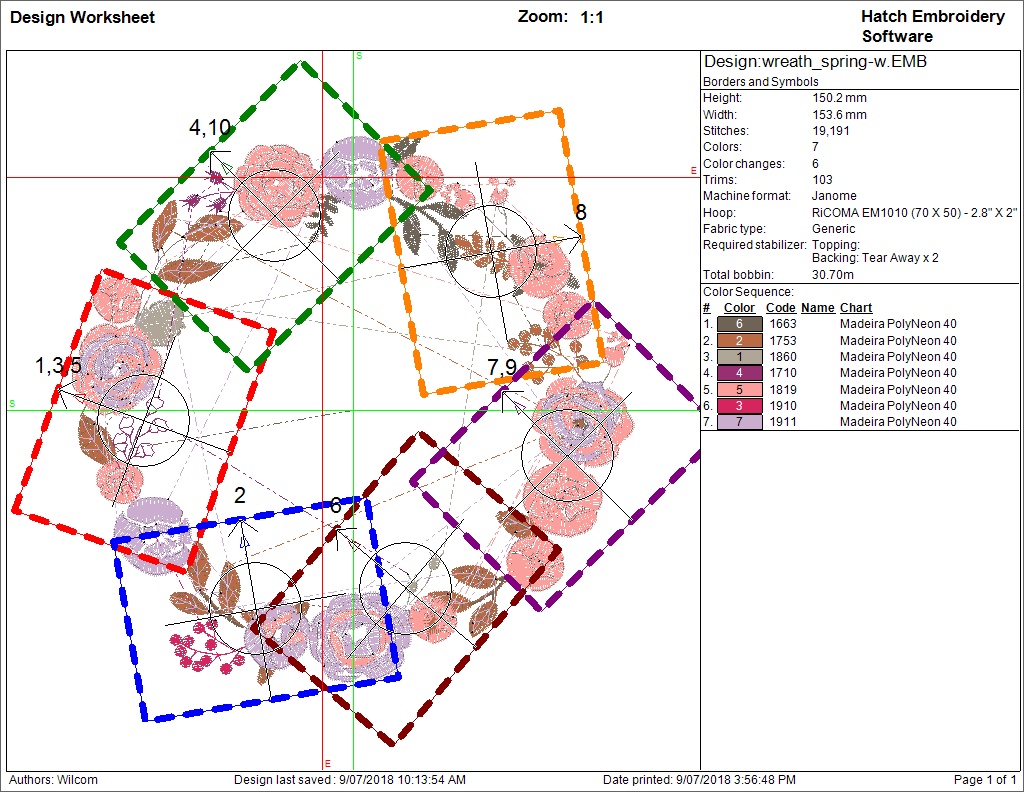
Printing Multi-Hooped Designs
You have the option of printing your Design Worksheet in multi-hooping view to show your hoops in their correct color sequence.
See how it is done here.
Watch this useful video on working with the tools in the Multi-Hooping toolbox.
Outputting Multi-Hooped Designs
The number of hoopings in a multi-hooped design do not necessarily correspond to the number of output files. It all depends on the layering of objects within the design. Often you will find that you have more output files than hoopings.
For correct alignment, you can add and stitch out registration marks for each hooping.
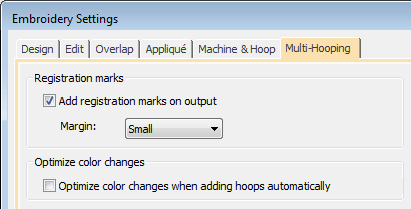
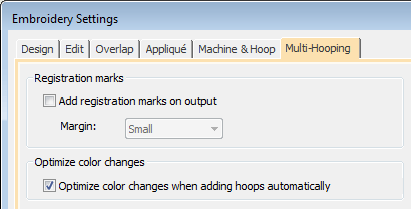
It is important to reduce the number color changes in a design. Activate the color optimization setting in the Multi-Hooping tab for it be applied automatically.
Find more detailed information on outputting your design and exporting it to your machine file format here.
Outputting with Multi-Position Hoops
Hatch Embroidery supports both MA and Giga hoops. These are two-position hoops which expand the available sewing are of the machine.
Read more about working with MA and Giga hoops here.
Watch this great video on how to hoop and stitch out your multi-hoop design
Hatch Embroidery software products are in popular use in over 100 countries. It is time to join the global trend and give Hatch a try! The 30-day Free Trial grants you unlimited use of all the amazing features and the 30-day Money Back Guarantee ensures that there is absolutely no risk involved.


Did you enjoy this article? We’d love to hear your feedback!