All you need to know about machine embroidery applique
Did you know that Hatch Embroidery Digitizer now includes an appliqué function? Now Hatch Embroidery Digitizer gives you more options than ever! The inclusion of our latest appliqué addition means an endless amount of new possibilities for your creations. Read on to learn all about appliqué and how you can use this feature to really perk up your designs!
What is Embroidery Appliqué?
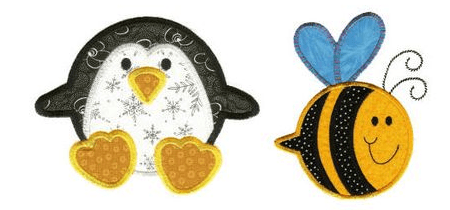
Appliqué is an embroidery technique that involves the adhesion of smaller pieces of fabric to a larger piece. The pieces often form part of a design and it gives a textured effect to your final product. Take a look at the image below to get an idea of what to expect.
How Appliqué will change your embroidery game!
With Hatch Digitizer, creating appliqué from scratch is super easy as the tools allow you to automatically generate the basics (placement line, cutting line, tackdown and cover stitches) of what you need for any appliqué design. Furthermore, the software is divided into a number of tools: Digitize appliqué, remove overlaps, partial cover appliqué and combine appliqué. Pick and choose from the tools you need for your personal designs! Read about these tools below…
DesignsByJuJu
Digitize Appliqué
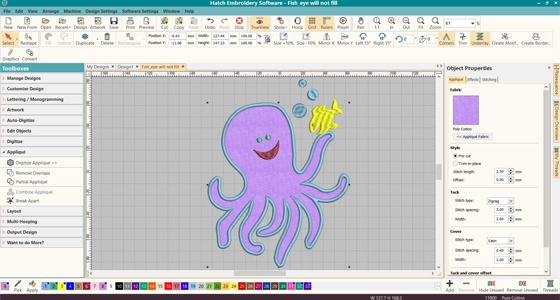
When working with appliqué it is important to keep in mind the different layers of stitching needed. When you use Digitize Appliqué, the tools included allow you to generate up to four layers of stitching – the program being able to generate all the stitching you will need. To open the properties, simply insert a backdrop image and click ‘Digitize Appliqué’. The docker will automatically open and you can make custom adjustments from here. To learn more about the specific tools included in Digitize Appliqué, read on…
Create Appliqué Objects: Digitize Appliqué allows you to generate the stitching you require for normal appliqué. Getting started is super simple with ‘create appliqué’!
Appliqué Styles: In Appliqué, you have two options – trim-n-place or pre-cut appliqué. Trim-n-place being where you place a patch of fabric, stitch the cutting line then trim the excess. Pre-cut is exactly what it says, where you pre-cut the shape of the appliqué patch and stitch the cutting line.
Appliqué Stitch Settings: Customize your stitch settings. Choose from satin, blanket or zigzag stitching for your cover stitch, you can also adjust stitch width and spacing. For your tack stitch, choose from single run, blanket or zig-zag, and then adjust width and spacing as you please.
Appliqué Fabrics: Assign a fabric or color to your appliqué patch. Choose from factory fabric, custom fabric or a solid color.
Remove Overlaps
So you’ve created your basic design or designs, what next? Say you have more than one appliqué object; when an appliqué design contains 2+ objects the lines can sometimes overlap, build up awkwardly or create a number of other issues. To combat this Hatch Digitizer: Appliqué has provided this tool to help you remove the stitching from underneath the overlapping areas. This way you only have one layer of stitching instead of the two overlapping ones.
Partial Cover Appliqué
The Partial Appliqué Tool allows you to remove the cover stitches where objects overlap, however leaves placement, cutting lines and tackdown alone.
Combine Appliqué
This tool breaks apart appliqué objects into guide runs, cutting lines, tack stitches and cover stitches. Once these components are separated, your software automatically combines and sequences them to give you the optimal results.
Use appliqué in a multitude of different ways from a simple addition, basic design or a creation consisting entirely of embroidery appliqué, This new addition to Hatch Embroidery Digitizer will help bring your embroidery to life!
To learn a little more about appliqué, take a look at the quick video guide we created here.
Hatch Embroidery software products are in popular use in over 100 countries. It is time to join the global trend and give Hatch a try! The 30-day Free Trial grants you unlimited use of all the amazing features and the 30-day Money Back Guarantee ensures that there is absolutely no risk involved.
Did you enjoy this article? We’d love to hear your feedback!