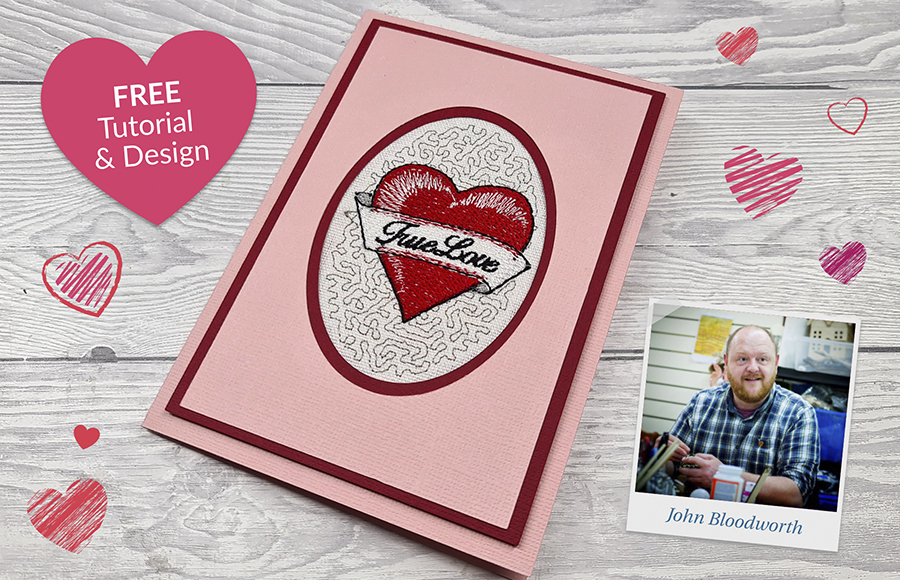
Nothing says “I Love You” better than a handmade card. Our friend John Bloodworth aka Gentleman Crafter created this beautiful embroidered card and graciously provided the tutorial as well as the FREE design to our faithful readers.
Over to John –
With Valentine’s Day fast approaching my thoughts turned to how I could create something quick but out of the ordinary. As I have been increasing my adventures in machine embroidery recently I felt that there was no better time to try something using Hatch Embroidery Digitizer.
After sketching out a rough tattoo style love heart with one of those swishy banner things I imported this into Hatch and set about digitizing it.
The background was an easy job using the Circle/Oval tool from the Digitize toolbox. This was to just give a random background so being able to apply the stipple single run stitch at the prod of an icon was a joy! Even better still was being able to fiddle with the settings in the Object Properties docker until I was 100% happy.
For the heart I chose to use the Digitize Closed Shape tool. I mean, there is a heart available in the Standard Shapes but, I’m a fussy old stitcher. Anyway, after digitizing the shape the only other change was to add a Florentine Effect to give the Tatami stitch some direction. The highlight to the heart involved the Freehand Closed Shape tool to give this a scribbly-wibbly style the underlay was removed from the tatami stitch and a feathered edge applied, all within a couple of clicks.
The banner was put together using a number of the digitizing tools, the best of which was the Digitize Blocks option. This was because I wanted the stitching to follow the direction of the swishy banner. Using the contour stitch in conjunction with this really made the “flow” look fantastic.
The heart and the banner were given outlines using the Outlines and Offsets tool in the Create Layouts toolbox. I was basically going for that cartoonish tattoo look where solid colours are surrounded by a solid outline.
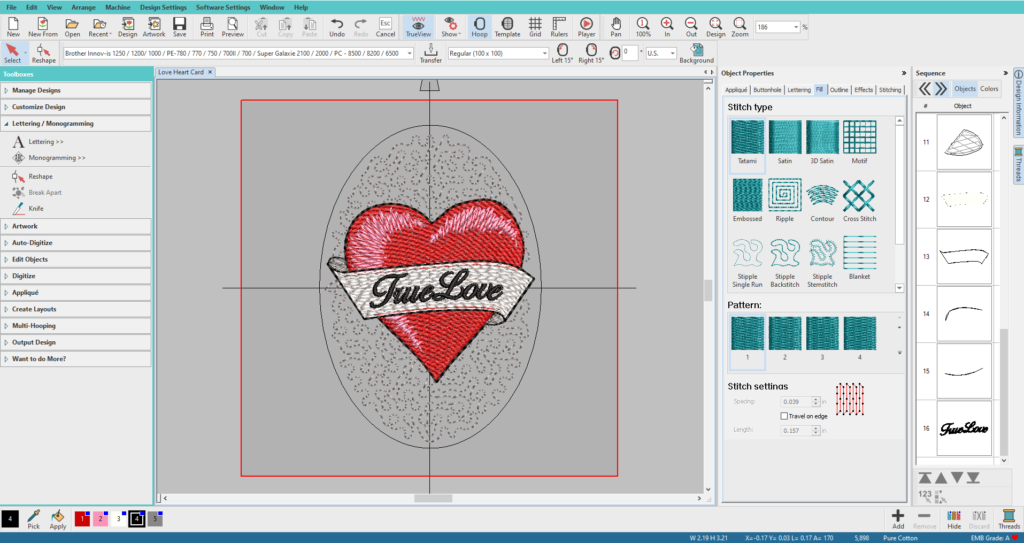
Now, the text, let me tell you about the text! I can’t even imagine how long it would have taken me to manually digitize just these two words but thanks to the Lettering toolbox, I was able to type out the words and immediately have the stitching almost ready to go. The Reshape tool and Baseline style options REALLY made the difference here though as I was able to make the text flow with the banner and adjust individual letters that weren’t quite “spot on”. Amazing!
Finally, so that I didn’t have a whole bunch of random stitch types crossing over each other and causing a proper mess, I prodded the Remove Overlaps button and bingo, all of the offending areas were immediately knocked out.
Anyway, long story short (too late), I think that I managed to use A LOT of the tools available in Hatch to create this but it came together unbelievably quickly and stitched out perfectly thanks to the software. Click, click, clickety click … stitch! That, my friends, is why I genuinely love using Hatch.
I could have framed this but chose to mount it in an aperture fronted card for a truly unique creation.
Hey presto, digitized, stitched and made in around an hour.
Right, that’s me just about done for this post, I hope that you like the design and have enjoyed this quick overview.
Hope to see you again soon!
John
https://youtu.be/yNjryxQ2YDk

Hatch Embroidery products are in popular use in over 100 countries. It is time to join the global trend and give Hatch Embroidery a try! The 30-day Free Trial grants you unlimited use of all the amazing features. You also get over 200 free online lessons by our embroidery experts in Hatch Academy to speed up your learning, so you can take full advantage of the trial.
The 30-day Money Back Guarantee ensures that there is absolutely no risk involved.

Hatch Academy
over 200 FREE Lessons

30 Day FREE Trial
all the tools & features

Money Back Guarantee
ease of mind

FlexPay
monthly instalments