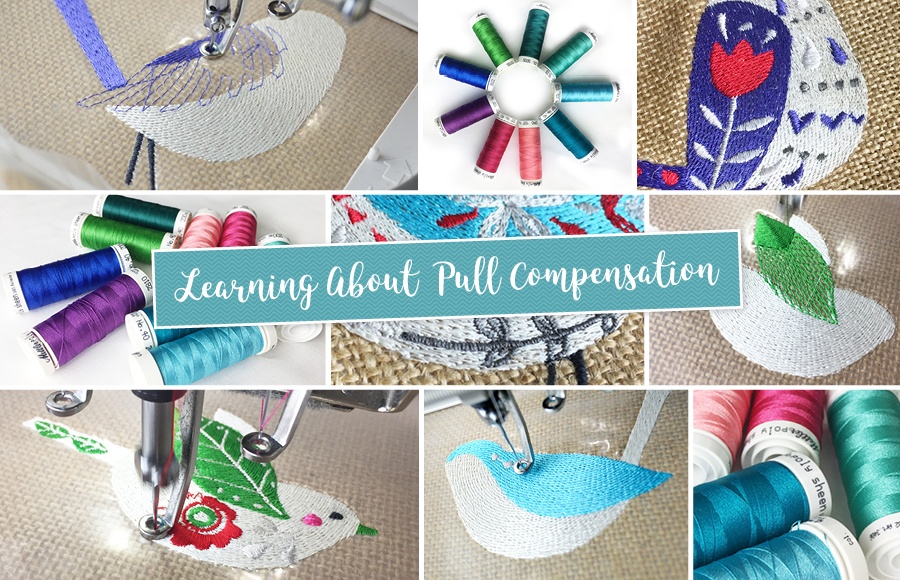
A detailed guide on how to compensate for the push & pull effects of machine embroidery for great results
As an embroiderer you always aim for the best possible end result. There are many factors that can have an influence on how your embroidery ends up when it comes off your machine. We have talked about choosing the right needles, fabrics and threads and about thread tension previously here on our blog.
In this week’s article we explain the pull and push effects in machine embroidery and how to use pull compensation to achieve great results every time.
As one of my very experienced colleagues always says: “Machine embroidery is not WYSIWYG.” meaning that what you see on your screen is NOT what you get off your embroidery machine. Why is that? As we showed in last week’s thread tension article, in order to create embroidery stitches your machine needs to form many-many tiny little knots where the needle penetrates the fabric and the bobbin thread and the top thread links together.
Push and Pull Effects
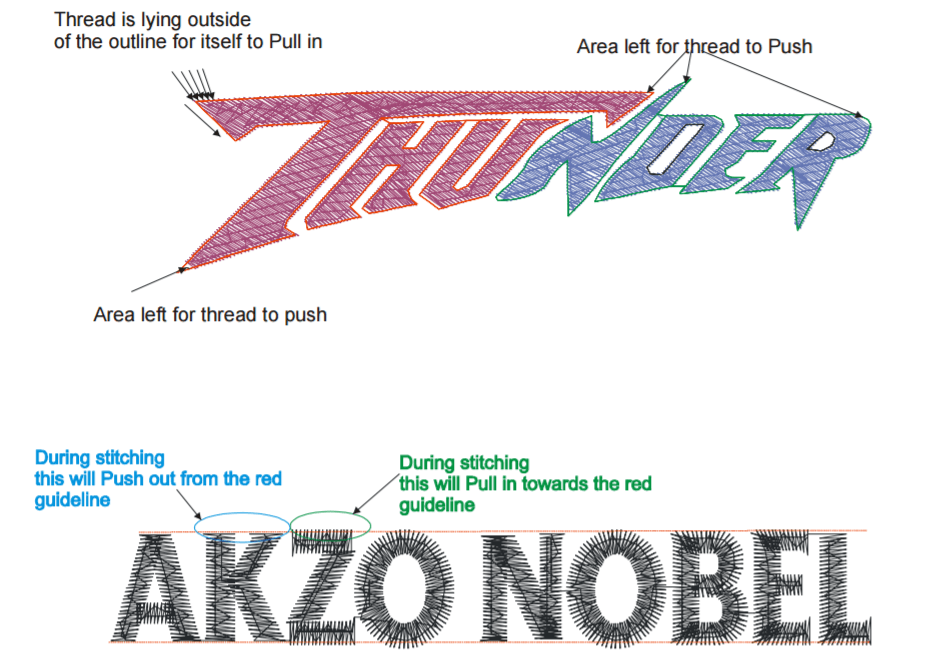
Because we embroider on various fabrics, which all have a natural stretch, there will always be some pull on your fabric as the hoop moves back and forth and the stitches are formed. This causes distortion and unevenness. The amount of pulling depends on a number of factors, such as the fabric you are using and how well you hoop it, the type of stabilizer you applied, the size of your design, the type of fill stitch and underlay stitching you are using. All of these together effect the outcome of your embroidery. During embroidery application, stitches pull the fabric in with the direction of the stitches. This can result in gaps in your stitch out.
Also, in the case of an area of fill, the stitching pushes out at a right angle to the line of stitching, so the embroidery will end up further out then what it looks like on your screen.
To compensate for the push and pull effects of machine embroidery for various types of fabrics and stitch types, you need to develop a certain level of digitizing experience.
What is Pull Compensation?
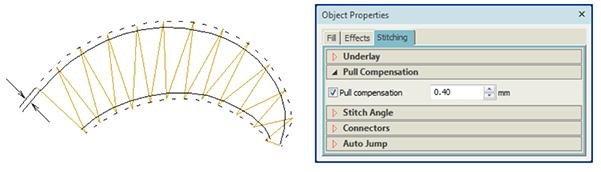
During the digitizing process you need take into consideration the natural pull effect and compensate for it, which means you need to add to the stitch length the same length of the expected pull.
Experienced digitizers can manually compensate for pull by overlapping objects as they digitize. Automatic pull compensation, however, counters the pull effect by ‘overstitching’ outlines of filled shapes on the sides where the needle penetrates.
How to Adjust Pull Compensation
Your test stitch out will reveal any areas which would benefit from fine tuning the pull compensation. When you do a test stitch out and you notice that there is too much pulling on the fabric, you will need to adjust your software settings to compensate for the pulling. It is easy to see if objects that should be touching or outlines have gaps between them.
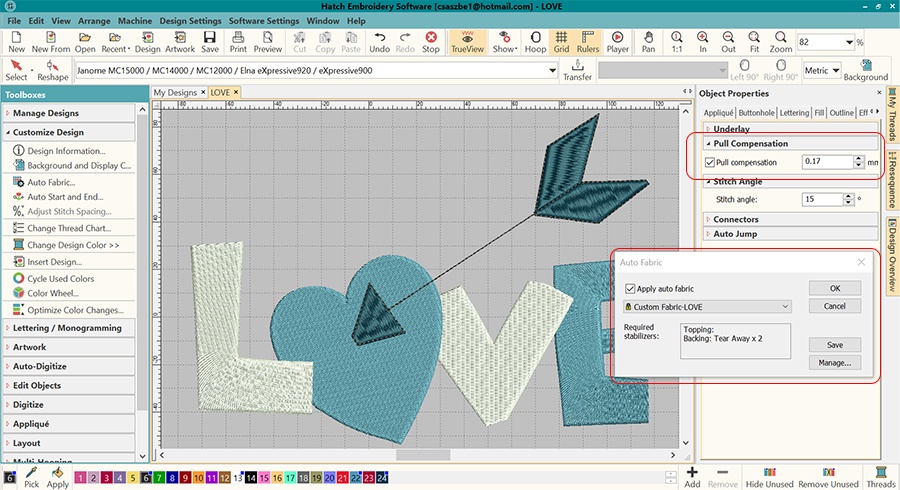
Check your software manual for adjusting pull compensation. Hatch Embroidery allows you to select the type of fabric you want to embroider on and it will set the recommended pull compensation for that specific fabric automatically. You are also able to manually override this by putting a value in. This means you can have different pull compensation for different objects in the design. This is very useful if you have different fill stitches in different areas.
See the below screenshots to see how to adjust pull compensation in your Hatch Embroidery software.
We appreciate your feedback. Please let us know how useful you found this article in a comment below.
Happy Embroidering!
Bernadett and the Hatch Team
Hatch Embroidery software products are in popular use in over 100 countries. It is time to join the global trend and give Hatch a try! The 30-day Free Trial grants you unlimited use of all the amazing features and the 30-day Money Back Guarantee ensures that there is absolutely no risk involved.