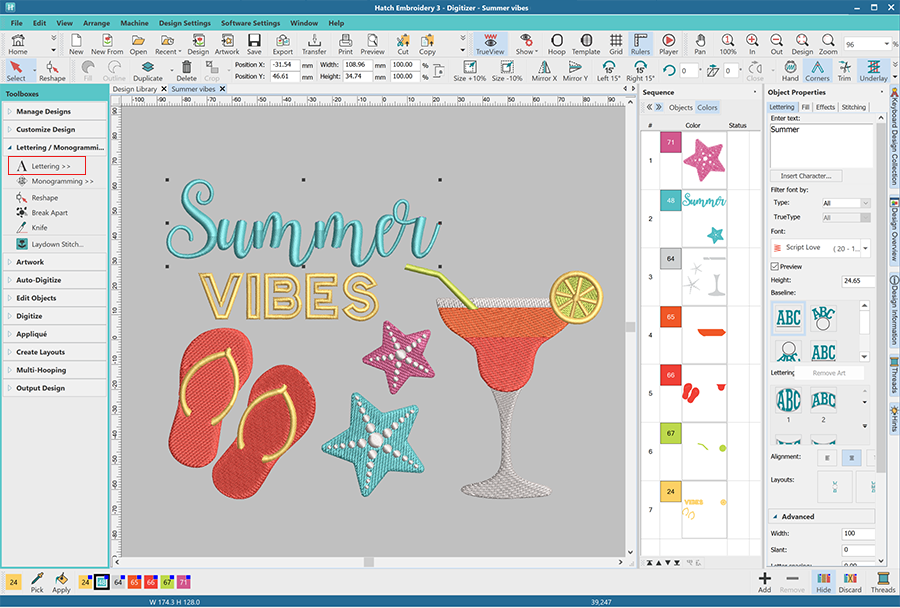
You can change the fill type of lettering with Hatch Embroidery. However, please note that certain fill types work best for lettering with even width on the individual letters. Make sure you always do a test stitch out before embroidering on your item to make sure it looks all good. If needed make adjustments or change the fill type.
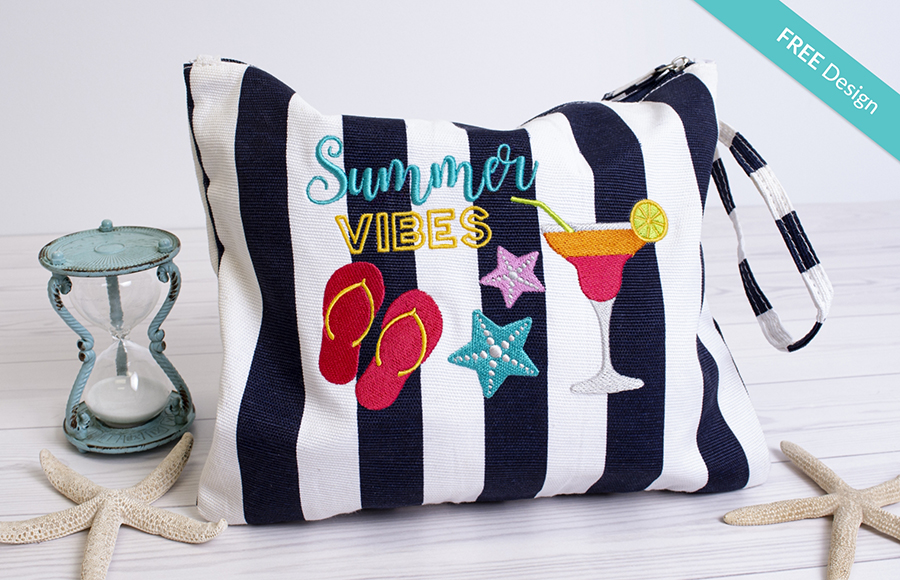
I wanted to avoid the dark stripes showing through the fabric, so I created two layers of the larger objects and used tatami fill. I changed the stitch angles 90 degrees on the top layer, so the stitches of the top object don’t sink into the stitches of the bottom one. I removed the underlay from both objects. It created a 3D raised affect. The embroidery became quite thick and rigid, but the fabric is also thick, so it could hold the heavier than usual embroidery. It might not be everyone’s cup of tea, but I quite like the density and texture. It also makes the embroidery slightly elevated, which gives it a bit of extra dimension. I just used the default stitch density setting, but the stitch density can be changed in Hatch Embroidery as needed.
If you embroider on thinner fabric, and want to avoid the pattern showing through, it’s a good idea to adjust the density of the underlay and/or the object. You can also float one sheet of tear-away stabilizer before stitching the underlay, then tear it away after the object is stitched out. In this case you don’t need to have two layers of the same object, but you will avoid overly heavy embroidery on your fabric.
On the topic of stabilizer, I floated a water soluble stabilizer on the top of the fabric to avoid the needle splitting it.
I wrote a blog a while ago about this Pineapple design and how I used the Sequence tool to ensure the objects stitched out in order. You can read it here and also access the free design.
Hatch Embroidery software products are in popular use in over 100 countries. It is time to join the global trend and give Hatch a try! The 30-day Free Trial grants you unlimited use of all the amazing features and the 30-day Money Back Guarantee ensures that there is absolutely no risk involved.