Let me start by saying how excited I am to be sharing with you how I digitized this beautiful seahorse! The response to my Facebook post was both humbling and incredibly uplifting. I know there are a lot of you who are really interested in learning how to digitize your own designs and appreciate all the advice you can get.
12 months ago I was completely new to digitizing and machine embroidery and only started digitizing my own designs quite recently. The tips I got from my work colleagues who are veteran digitizers was invaluable and sped up the learning process immensely. You can read more about my story here and see my Australian bird designs too. Some of them are already available for free here.
Digitizing is a wonderfully creative hobby and a very addictive one too! 🙂 Once you get the hang of it, you just want to do more and more. Like with any other form of creative art, there are no rights or wrongs. Once you learn the basics, you can keep it really simple like creating monograms, or take it as far as you like, pushing the boundaries and exploring new ways and methods.
Very common advice from experienced digitizers, is that you must not be afraid to make mistakes. They are a huge part of the learning curve. You probably won’t get it right at first, but that’s perfectly okay, you will learn a lot in the process.
Techniques, Tools & Stitch Types used
Digitize Closed Shape tool
Digitize Open Shape tool
Digitize Blocks tool
Tatami stitch
Triple Run stitch
Ripple Stitch fill
Feather Edge effect
Gradient Fill effect
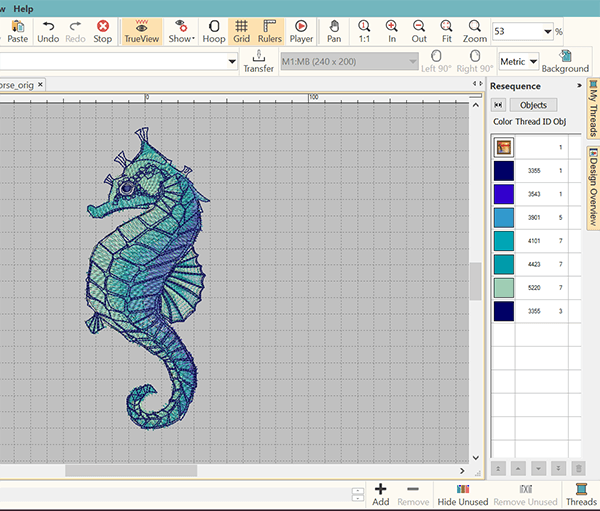
Threads Used
Isacord/Mettler Poly Sheen
5220 Silver Sage
4423 Marine Aqua
4101 Wave Blue
3901 Tropical Blue
3543 Royal Blue
3355 Dark Indigo
Inserting Your Design
No matter what digitizing software you may use, you will always start by finding an image (clipart, drawing or photo) that you will need to insert into your software interface (your work area), so you can trace it. Because essentially that is what digitizing is about. You digitize the shapes and then you pretty them up by using different colors and stitch types.
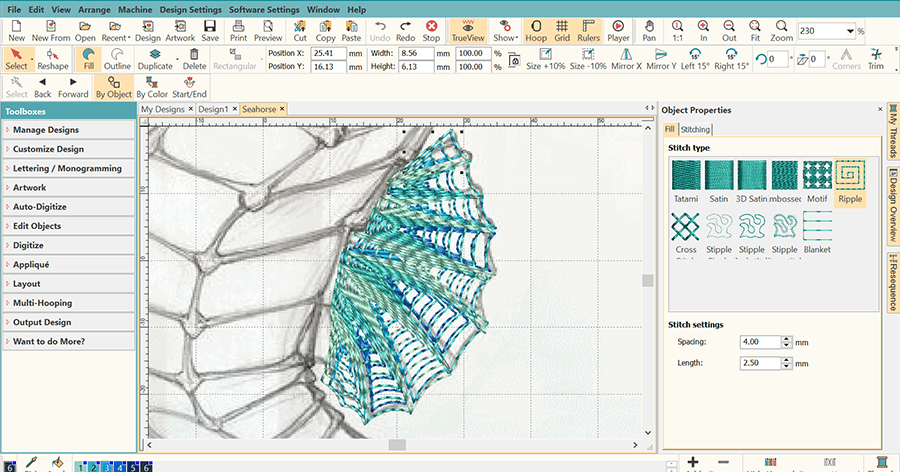
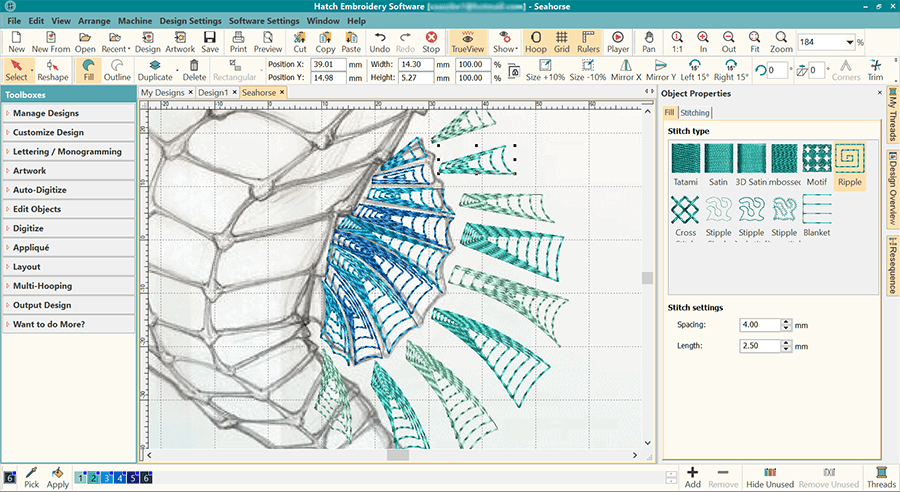
Digitizing the Fin
I wanted to make this part of the seahorse delicate and ethereal. So I digitized each part of the fin individually and used the Ripple stitch. I alternated the colors and then created a duplicate of the fins. I then used two other colors alternating on the second set.
Digitizing the Body & Head
The body consists of 6 overlapping objects, one for each of the colors in my color palette. I digitized these using the Digitize Blocks tool. This tool is great for long narrow shapes as you create digitizing points in pairs. It makes it easy to add and adjust stitch angles.
You will see how I used the Feather Edge and the Gradient Fill effects for color blending and shading.
Digitizing the Outline
What’s interesting about this part is that the outline is one continuous stitch. I wanted to achieve an organic look with varying thickness to the outline, just like a pencil drawing. Using the Digitize Open Shape tool, I digitized a long continuous line, occasionally going over lines of the artwork twice or even three times where necessary. This created a varied thickness to the line, imitating the look of a pencil drawing.
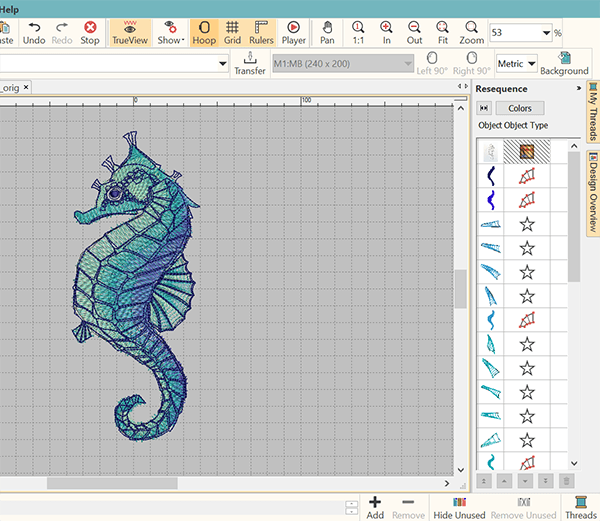
Resequencing Your Design
Before you finish, you have to make sure that the objects of your design are in the right order to minimize color changes. You can reorder them by opening the Resequence docker and selecting Objects. You can grab and move the objects up and down. The one on the top will stitch out first and the one on the bottom will stitch out last.
If you click Colors, the number of squares you have equals to the number of color changes. Your aim is to reduce the number as much as possible.
Stitch Player
By playing the stitch out of your design, you make sure that everything is in order. You will see if you need to make any final changes or adjustments before you stitch out your design.
Exporting to Your Machine File Format
One last thing you need to do before you can stitch out your design is to convert your working .EMB file to your machine file format. Click File > Export Design and select the required file format from the drop-down menu (Save as type).
Hatch Embroidery software products are in popular use in over 120 countries. It is time to join the global trend and give Hatch a try! The 30-Day Free Trial grants you unlimited use of all the amazing features and the 30-Day Money-Back Guarantee ensures that there is absolutely no risk involved.