Fun quilting tutorial series with Kristie J Smith - FREE tutorials and embroidery designs
It’s the last installment of the Hatching a Quilt tutorial series. I’m feeling very accomplished and also a little sad. I hope you have had an amazing journey through just a few of the innovative tools that Hatch Embroidery Software has to offer. Additionally, my hope is that these projects have sparked your creativity and instilled self-confidence.
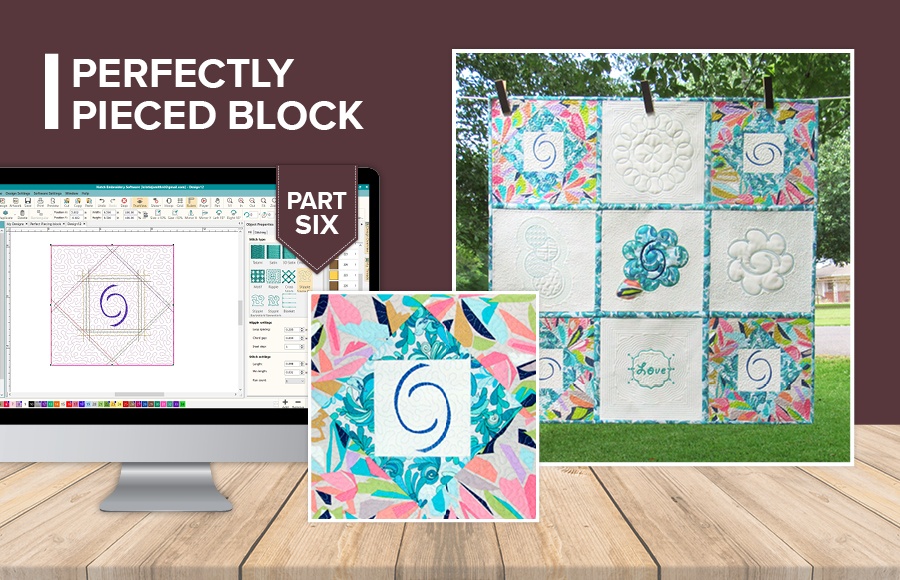
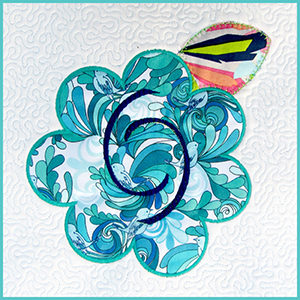
The Perfectly Pieced block was my favorite to stitch, but challenging to explain. Don’t let the lengthy lesson scare you, it’ll teach you skills worth learning. Once you get the concept, you will want to explore constructing numerous pieced blocks with your software. Hatch Embroidery truly does turn a challenge into a joy and creates a block that is pieced with precision with every stitch-out!
Basic Objectives and Creative Options
The goal is to have fun and become more familiar with Hatch Embroidery.
The quilt blocks in this project are all created in Hatch Embroidery Digitizer and stitched completely in the embroidery hoop. Block assembly is done on the sewing machine.
The basic concepts learned in the lessons are stepping-stones to your creativity. Consider using these techniques in combination to build new quilt blocks.
Don’t be afraid to flex your creative muscles and put your own slant on the quilt. You are the designer and Hatch Embroidery provides endless opportunities to express your imagination.
Blocks are 10” square (9.5”/24.13 cm finished) and there are lessons for 6 different blocks in the project (9 blocks total with duplicates in the corners). The finished quilt project as shown is 28.5”/72.39 cm X 28.5”/72.39 cm. Note: Block size can easily be adjusted based on the hoop size used and additional blocks can be added to make a larger quilted project.
Embroidery machine tension may need to be tweaked so that upper and lower threads are evenly balanced.
Fabric for front of blocks: (white)- 1.5 yards/1.4 meters recommended or adequate fabric to cover the hoop used
Fabric for back of blocks: (print)- 1.5 yards/1.4 meters recommended or adequate fabric to cover the hoop used
Fabric for applique and pieced blocks: ¼ yard/0.25 meters each of 2 prints
Batting: 1.5 yards recommended or adequate fabric to cover the hoop used (enough for 9 blocks)
Sashing fabric (Print): 1/3 yard / 0.3 meters
Binding fabric: ¼ yard/0.25 meters
Mesh-type cut-away stabilizer: 1 roll, width/height to cover selected hoop
Temporary adhesive spray
Assorted embroidery thread
Optional Supplies
Applique’ scissors for removing excess stabilizer/clipping around appliqued fabrics
Rotary cutter/mat and acrylic rulers (12”/304.80mm square and long ruler recommended)
Masking tape (to better secure the backing of the blocks while stitching as backs are not hooped in most blocks)
Invisible thread (used to top stitch sashing fabrics)
Water-soluble stabilizer: 1-2 sheets for Trapunto block
Supplies for the Perfectly Pieced Block
Circle embellishment design (included in the zip file you download)
Backing fabric: Minimal 12”/304.8 mm square (to be trimmed after embroidery)
Batting – 1 piece large enough to cover the hoop
Stabilizer – 2 sheets to cover the hoop
Fabric for piecing (approx 1/4 yard each fabric + 4 square of white fabric approx. 5″ each)
Assorted Embroidery Thread
Temporary Spray Adhesive
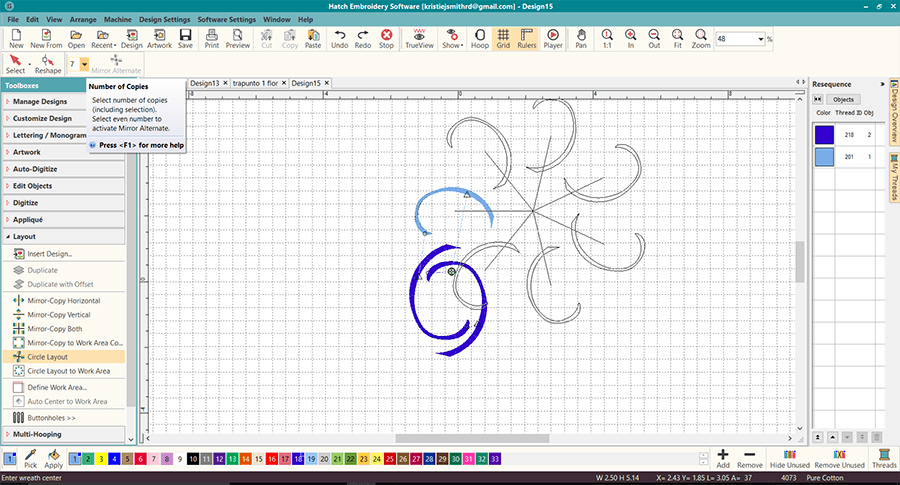
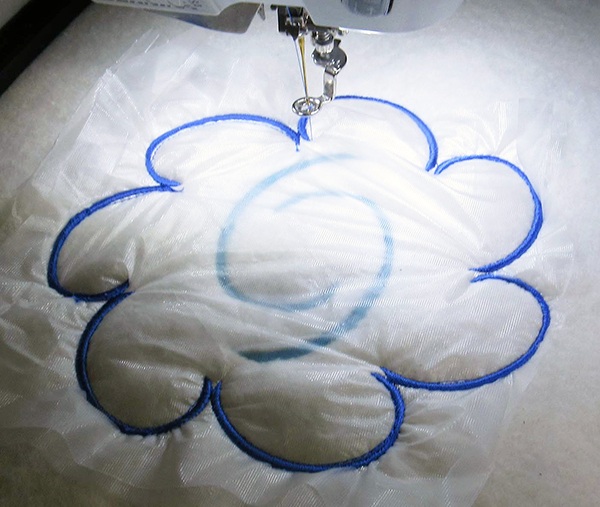
First I will show you how to create the design in the center.
Then you will learn how to create the flower by using the center design and the Circle Layout tool.
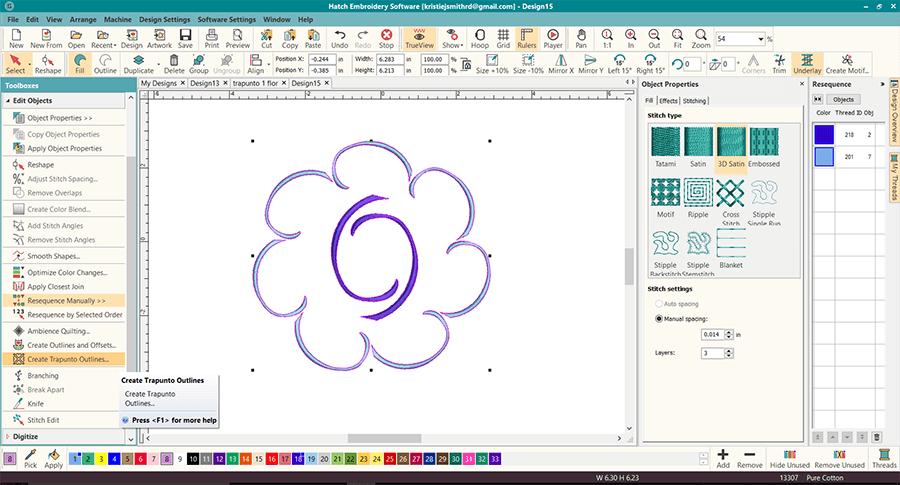
The next step is creating the trapunto.
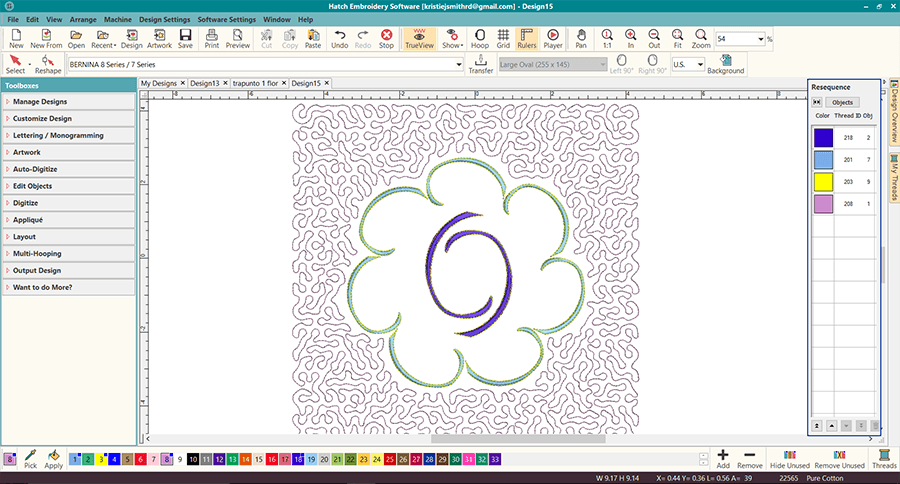
We will finish the block design by using the Ambience Quilting tool.
Finally all there is left to do is stitch out your block!
Please note: You will need to sign in or register a free account to be able to download the free project.
Once you registered an account, you will have unlimited access to ALL the free projects that are currently on the Hatch Embroidery website and future ones two. You will also automatically receive our newsletter about free projects and designs. You will NOT be requested to download the software. Having an account does not come with any obligations to you at all.
Kristie has been an educator, designer, business consultant, and sewist for over 20 years. She currently consults for the sewing industry, providing guidance on product development, writing articles, testing products, teaching, and creating marketing pieces.
Hatch Embroidery software products are in popular use in over 100 countries. It is time to join the global trend and give Hatch a try! The 30-day Free Trial grants you unlimited use of all the amazing features and the 30-day Money Back Guarantee ensures that there is absolutely no risk involved.
Did you enjoy this article? We’d love to hear your feedback!