Read how to reduce the number of jump stitches or eliminate them altogether!
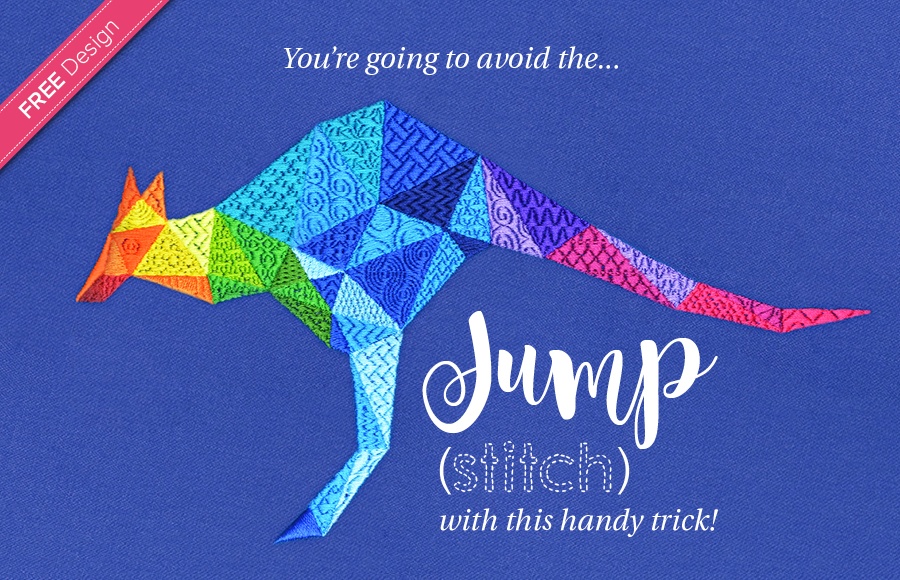
We all know how annoying it can be having to clip all those jump stitches after we finished stitching a design. Unfortunately, depending on the design of course, sometimes it cannot be avoided. In this article I will show you how, with a little bit of planning, you can eliminate all the jump stitches in a complicated design just like this kangaroo.
At the end of this article you will find a link to our Resource Center where you can download this stunning FREE kangaroo design.
What Are Jump Stitches?
When stitching out a design you may see loose pieces of embroidery thread that connect two objects of the same color, but do not touch one another. These are called jump stitches.
When stitching out your design you want to avoid re-threading where possible as it takes a lot of extra time. This is required whenever your single-head machine has a color-change. So the way to avoid this is by grouping all the objects with the same color together. The down-side is that you end up with jump stitches when the needle moves from one object to the next and you will need to spend time clipping all the loose thread off your embroidery.
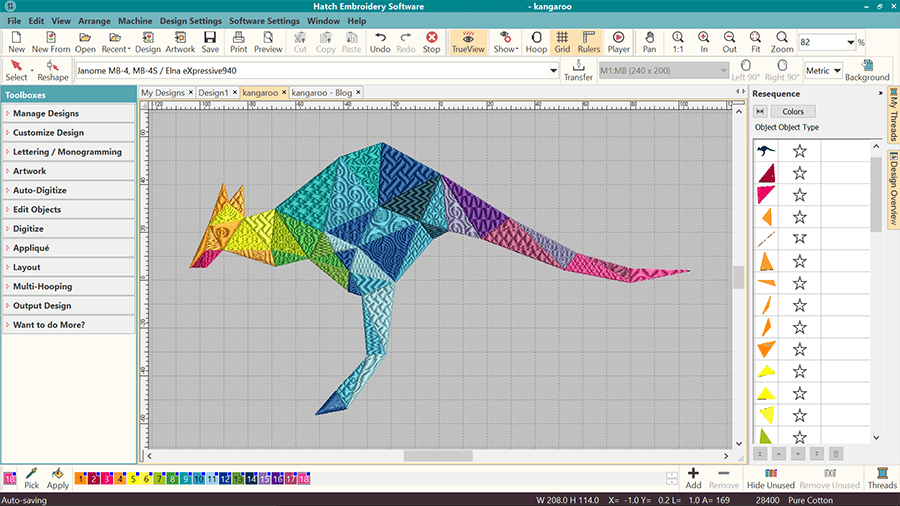
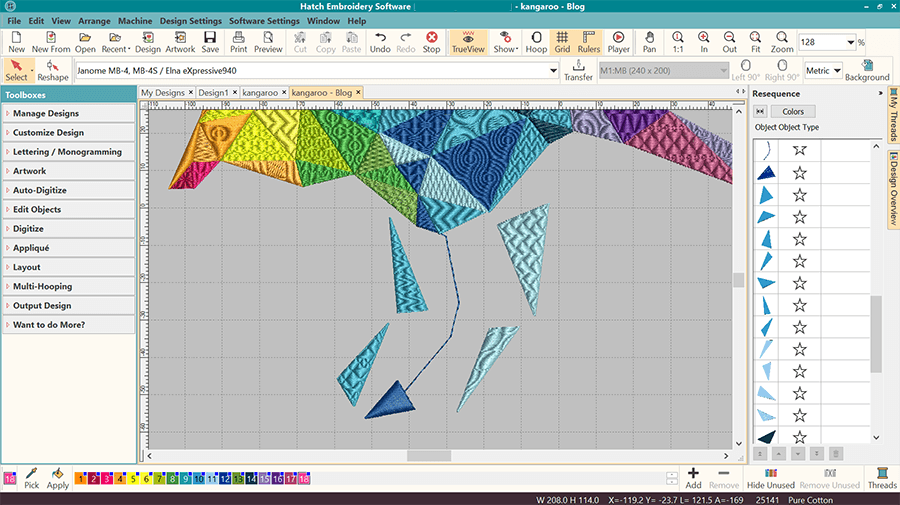
To achieve the fewest thread-changes, it is really important to plan your digitizing carefully. You need to decide which objects are going to be in the front and which in the back. You can either digitize the back ones first and the top ones last, or using the Resequence tool, you can easily change the stitch order when you are done.
You can see on the right side of this image how the same color objects of this design are grouped together.
How Can I Minimize the Number of Jump Stitches?
Hatch Embroidery software has an ‘Apply Closest Join’ feature which will help set the end and start points of the same color objects as close together as possible. While this will minimize your jumps, it will not completely eliminate them. If your machine has auto trims, this is generally not a problem. But sometimes we do not want our machine to trim so often or maybe we have a machine that does not have auto trims.
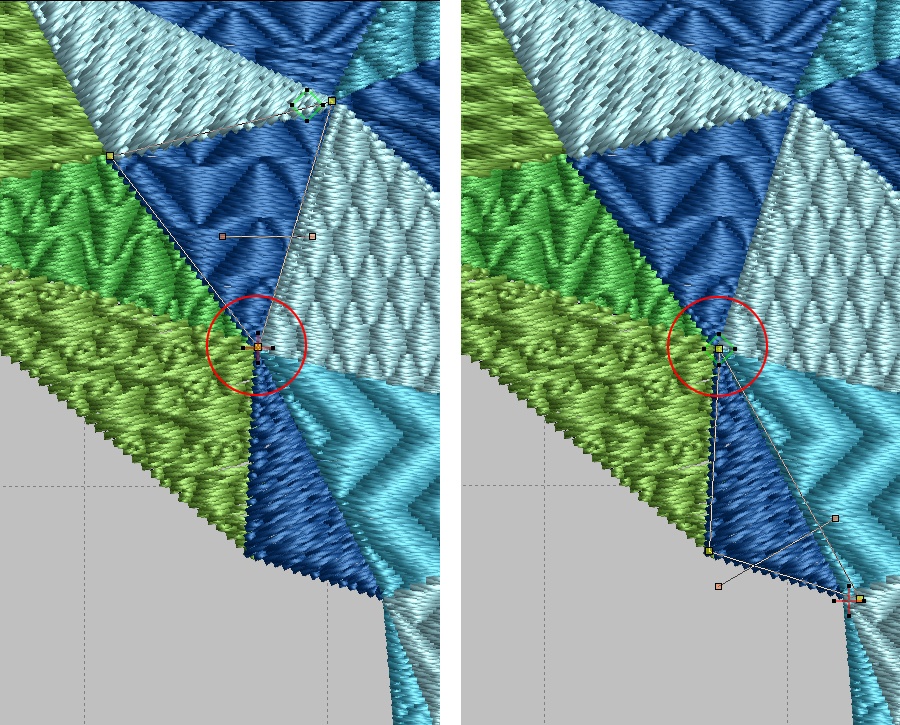
In this case you can add run (also called ‘walk’) stitches. If the same color objects touch each other, all you need need to look out for is the start and end points. They need to be as close together as possible. In the image below you can see that the end point (indicated with the red cross) of the upper object is in the same position as the start point (indicated with the green square) of the lower object. If you manually want to change the start and end points you need to select the object and click ‘Reshape’.
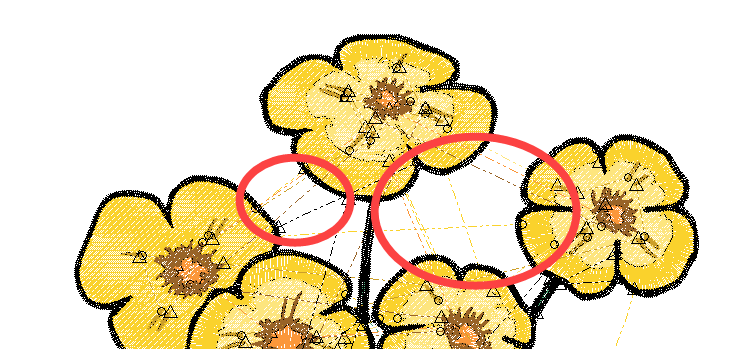
If the same color objects do not touch each other, and you want to avoid having a jump stitch, you can digitize a run stitch (also called ‘walk’ stitch) to connect the two. When using a run stitch, you will have to make sure that there are other objects stitched on top of the run stitch to cover it up. You will also need to be careful that the thread color of the run stitch will not show through the object’s color that will cover the run stitch up.
What is a Run Stitch?
It is a digitized open shape, a line that you can use to connect objects that are not touching each other. So instead of a piece of loose thread (jump stitch) that will need to be cut off, it is a stitched line that will eventually be hidden behind another embroidered object. Far neater and easier to deal with.
How Can I Eliminate Jump Stitches Altogether?
When I started working on this kangaroo design, I found myself in the lucky situation of having a solid block design with no gaps between the objects. There are no overlapping objects or ones that sit on top of each other either. In this example, you can completely avoid jump stitches altogether! As explained above, you need to carefully plan out the stitch order of your color groups and use run stitches to connect same color objects that are far from each other and ta-da!, no more annoying loose threads to cut off at the end!
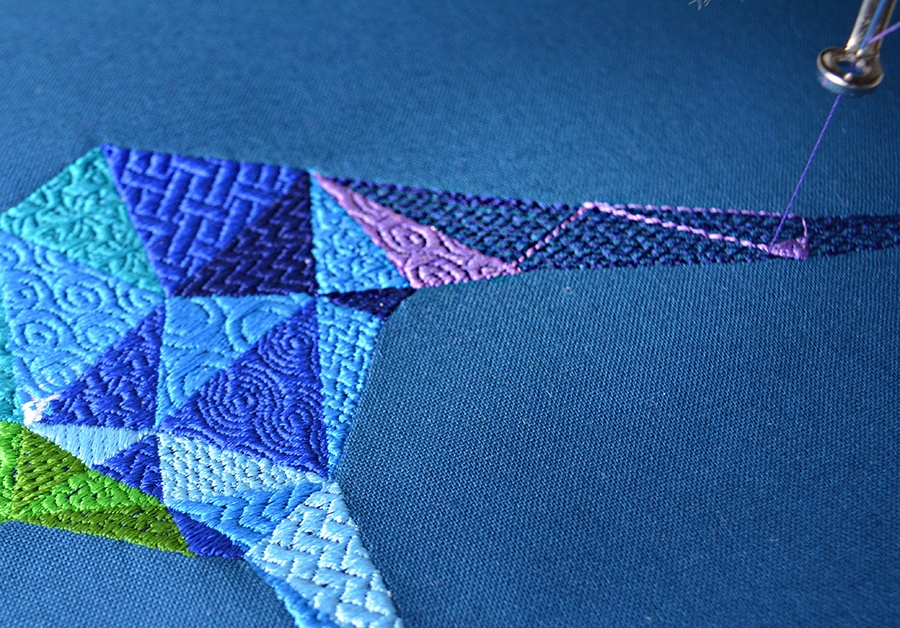
The image below shows you how the lilac color run stitch connects the two lilac objects that are further apart and not touching each other. The dark blue stitching underneath is the global underlay which you can read about further below.
Tip: Use a ‘global’ underlay when you have a patchwork-like design such as this kangaroo.
Global Underlay
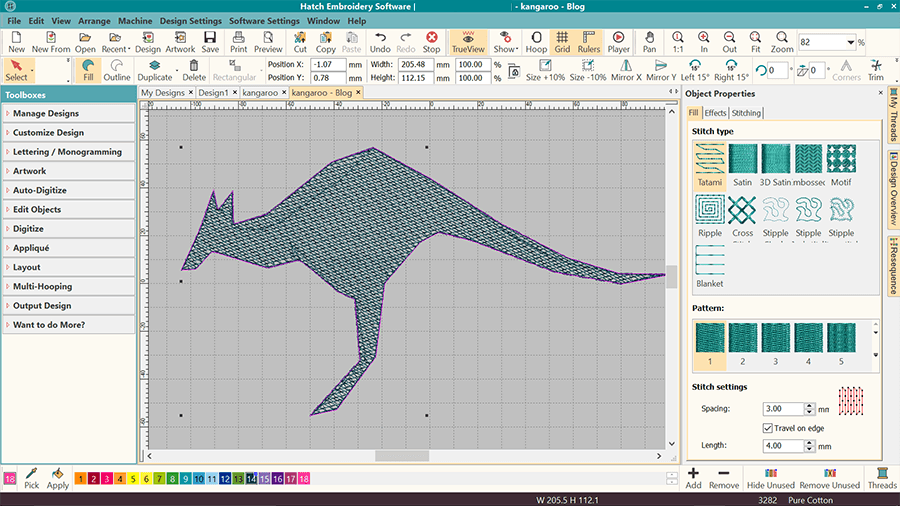
Hatch Embroidery sets the underlay automatically for each object. It is a fantastic feature that makes it really easy for beginners. In certain cases however, you might want to do things a little differently. This kangaroo design has many objects and because I used Embossed fills for almost all of them, the stitch angles are the same. This is not ideal from a push-pull perspective. You can read more about the push and pull effect here.
In order to reduce the push-pull effect in the design and avoid potential gaps between the objects, I used a different technique by digitizing a global underlay. I digitized a closed object in the shape of the kangaroo, chose the Tatami fill and increased the stitch spacing to 3 mm. This gave me a good solid base to embroider all the objects on and avoided the fabric moving during the stitching. I switched off all underlay settings for this object, because it IS actually the underlay. I also manually changed the underlay setting for all the top objects to ‘Edge Run’.
Tip: When using embossed stitches the bottom color usually shows through the top one, so I recommend you chose your color for the global underlay that will blend in the background or enhance the overall design. I used dark blue for the global underlay with the kangaroo design to match the color of the fabric I was stitching on.

Please note: You will need to sign in or register a free account to be able to download the free design.
Once you registered an account, you will have unlimited access to ALL the free designs that are currently on the Hatch Embroidery website and future ones two. You will also automatically receive our newsletter about free projects and designs. You will NOT be requested to download the software. Having an account does not come with any obligations to you at all.
Happy Embroidering!
Bernadett & The Hatch Team
How did you like this article? Please leave a comment below, we’d love to hear your thoughts and feedback!
For those who have not yet tried Hatch Embroidery, register and get the FREE 30 day trial today and join our incredible Facebook family too!