You don’t always need background artwork to manually digitize a simple design. Hatch Embroidery Software gives you many tools and features to make digitizing your own designs very easy. In this article we are going to answer all the questions you may have about manual digitizing. We give you step by step instructions and two fantastic videos to show you how simple it can be.
For our example today, we will create simple daisy flowers and then add stems and leaves to them. We have created two videos to show you how to do this in the software. We have also written the basic instructions here for you to reference as you try it yourself. Let’s get started!
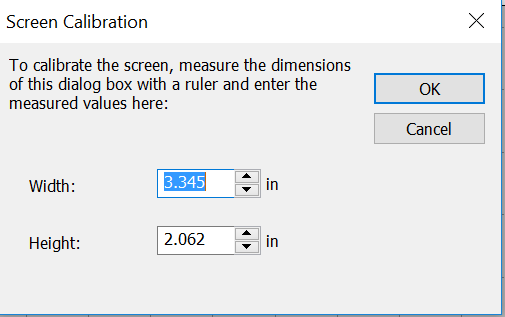
Hatch Tip: Before you begin, do this! Be sure to calculate your grid first. Click the Settings Menu, then click Screen Calibration.
The measurements will be shown in inches (in) or millimeters (mm) depending on the setting you have for your software.
If you do not see your measurements window showing on the upper toolbars, maximize your software screen.
Still now showing? You probably have a function active or object selected. Press the ESC key twice to cancel any active functions.
Play the video below and then follow the instructions underneath it to create your own daisy flower in your software.
How do I gauge the size I’m digitizing?
Use the grid to help estimate the size of each object. You can then easily resize the object to get perfect results.
What tools should I use?
For the petal use the closed shape tool For the center of the flower use the circle tool
Hatch Tip: Remember to use a left mouse click for a straight line and right mouse click for curved lines. When finished, click “Enter” on your keyboard to complete the shape and fill the stitches.
How do I use the circle tool?
Select the circle tool, then left click to establish the center point. Holding mouse key down, drag and click again to establish the radius of the circle. Press Enter on your keyboard.
How do I change the color of the center circle?
Select the circle, then click on the desired color in the Design Palette at the bottom of the screen or double click on the desired color in your My Threads Docker.
How do I change the size of the object?
Select the object or objects. You will see four reference boxes around them. Select one of the corner nodes and drag to the desired size.
How do I change the stitch type?
If the Object Properties Docker is not open, double click any object to open the Docker. Select the object or objects that you want to change to a specific stitch type, then select the desired stitch type in the Docker. You will see the changes on the screen.
Hatch Tip: All objects selected will be changed to the same stitch type so make sure you only have the objects selected that you want to make changes to.
Hatch Special Feature: Notice if a satin stitch is too wide for best quality stitching, the Hatch software will automatically split the stitches at random points. If you reduce the size of the object, the auto split stitches will disappear when the size of the object is brought back into the safe column width size.
How do I change stitch angles?
Select the object, then select the Reshape tool under the Edit Objects Toolbox (hot key is the letter “O”). You will see the angle tool displayed. Move the angle tool to the desired angle.
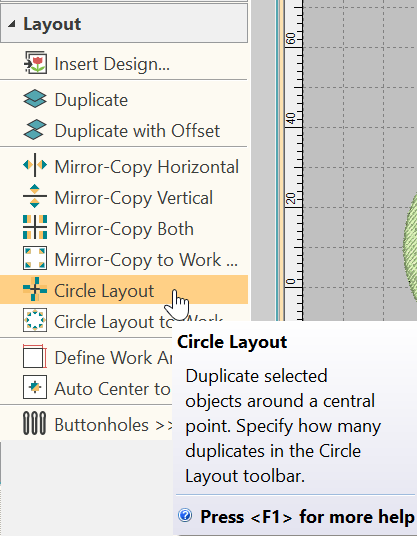
How do I create multiple petals without digitizing each one?
Digitize the single petal, then Select the single petal. Click on the Layout Toolbox, then Select Circle Layout tool.
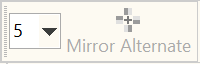
Select the number of petals you wish to create from the context toolbar at the top.
Drag your mouse to the position you want the petals to sit. For our example today we want to slightly overlap the petals to create the flower head. Click “No” when asked if you want to merge the overlapping objects because we want to keep each petal as separate objects. This will allow each object (petal) to maintain its own properties, stitch angle, color, etc.
How do I make the center of my petal on top so it stitches last?
Use the Resequence Docker to drag the colors to the stitching order you desire.
Now have a bit of fun by changing the petal colors!
I’m finished. What do I do now?
Use the Stitch Player to watch your design “virtually sew”, so you know the sewing order it will stitch out. Use the Resequence Docker if you need to make changes. Save your design to .EMB so you can come back to the pure file if you want to make changes later. File Menu > Save Design as…
You have now finished manually digitizing your very own flower using the Hatch Embroidery Software!
Let’s continue! In the next video we will show you several more basic digitizing features.
You will learn how to:
Create additional flowers using the group tool and duplicate by clicking and dragging
Create stems using the open shape tools
Change the color sewing order with the Resequence Docker
Use the Branching tool to prevent excessive jump stitches
Create leaves using the Bock digitizing tool
Creating identical leaves
Group and duplicate the leaves
Rotate the leaves to the desired position
I’m finished again. What do I do?
Use the Stitch Player to watch your design “virtually sew” so you know the sewing order it will stitch out. Use the Resequence Docker if you need to make changes. Save your design to .EMB so you can come back to the pure file if you want to make changes later. File Menu > Save Design as…
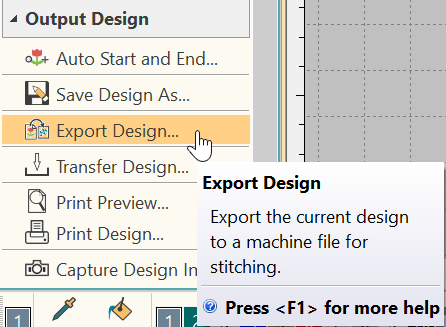
How do I save the design to my machine format?
First be sure you have saved the design to .EMB. Now you are ready to save (export) to your machine file. Click to open the Output Designs Toolbox, click “Export Design”, then select your machine type and click “OK” to save.
Happy Embroidering!
Bernadett & The Hatch Embroidery Team
TRY HATCH FOR FREE!
We now offer a FREE 30 Day Trial of Hatch Embroidery Digitizer, the full version of the software. No credit card required. Designed for hobby and home business embroiderers, Hatch is powered by Wilcom for professional results. It is loaded with amazing tools and features. Click to download your free trial now and experience first hand the ease of use and incredible creativity and flexibility Hatch offers.